
Sciatic nerve pain can stem from many different things. Often athletes and former athletes experience sciatica nerve pain in the back and neck areas, but this type of nerve pain can affect those who workout without doing proper stretching exercises or simply people who perform everyday activities beyond their body’s capacity. Aging and overuse of the body is also quite often the culprit. If you have ever experienced sciatica, you will know that it is one of the most painful things that can happen to the neck and back area, and all too often doctors can only offer you medicinal relief. There are specific exercises, however, that can bring some long-term relief for sufferers of this very common nerve pain.
Let’s explore 4 exercises that sufferers can do on a regular basis to ease the pain of sciatica:
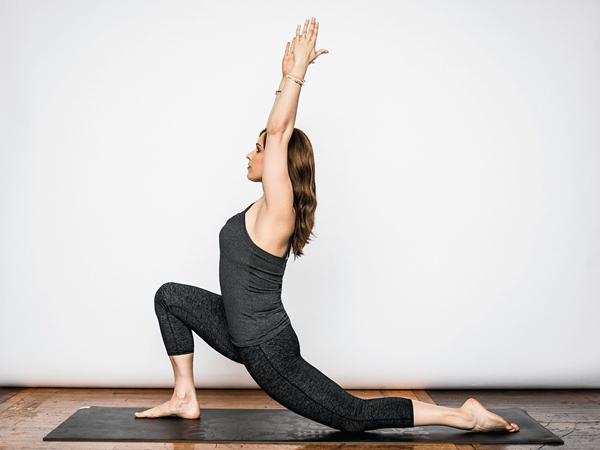
1. The Lunge
Most runners are aware of the lunge. You begin the lunge with your right leg forward, so that your right knee is actually positioned slightly over the ankle. Your left leg should be nearly flat on your exercise mat with the top of your left foot almost flat to the floor. Your beginning position should look like the photo below.
The second lunge motion is to slowly raise your torso with a good stretch and then lower your arms until they are resting on your right knee. That is what you call a complete lunge move. Now it is time to switch sides by relaxing your right leg back onto the mat with the top of your right foot resting flat onto the floor, and the left knee bent leaning slightly over the left ankle. Repeat the same motion by gently raising your torso with arms stretched upwards towards the ceiling and then lower your arms until they are resting on the left knee. Attempt to hold each pose for approximately 30 seconds if you can. When you first begin these exercises, hold each pose just as long as it is comfortable for you. The objective is to stretch the body and not hurt yourself.
2. The Frog Pose
The Frog Pose is a simple stretching exercise for lower back sciatica pain, but always remember to do these exercises to the best of your ability. You are not competing, your aim is to give the body good healthy stretches which is something most of us neglect to do. If you ever notice animals, they stretch a multitude of times daily. Stretching is a natural part of taking care of the body that most of us underestimate. If your knees and ankles are in good health and pain-free, the frog pose should be simple for most sciatica sufferers. Lay down facing the floor with your mat lying horizontally beneath you, protecting your knees and ankles from the floor. Your body should be positioned like the photo below.
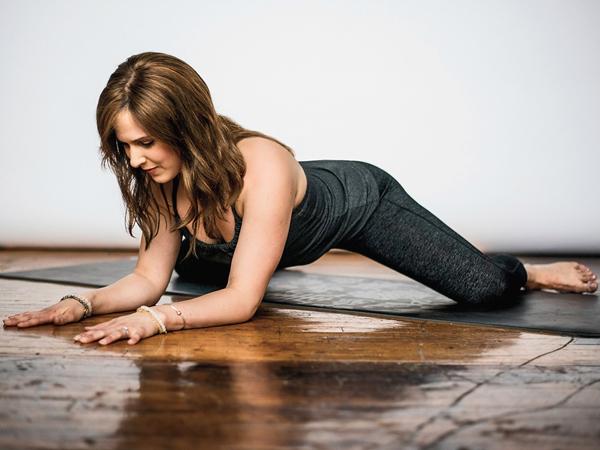
Gently widen your knees but only to a comfortable position. When you feel a good stretch in the thigh area, stop and hold the pose for a few seconds. Make certain that the insides of your calves and feet are resting on the mat. Move from an all-fours position to slowly leaning your elbows and forearms to the floor.
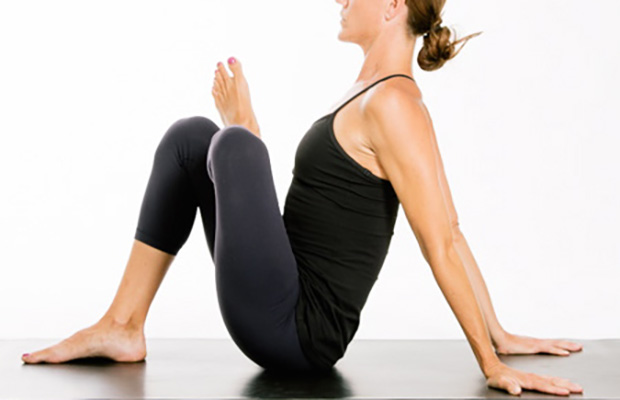
3. The Seated Pigeon
It may be a funny name for a pain relief exercise but the consensus is that it does work to relieve the pain of sciatica. First be seated on an exercise mat with your knees bent and feet flat on the floor. Your arms should be stretched behind you, hands flat with palms facing the floor. Begin by placing your right ankle upon your left thigh. Make sure your back is straight and not curved. A straight back prevents further pain and damage.
Hold this pose for approximately 5 to 8 full breaths, meaning inhale hold a second, exhale. Then switch legs and position yourself the same as you did with the opposite leg, hold again for 5 to 8 full breaths and release. The seated pigeon is simple enough to be done once a day or at least three times a week. If you are in the midst of experiencing unusually bad sciatica pain, you should see your physician and make sure that nothing else is wrong.
4. Child’s Pose
By far one of the easiest, yet effective, back exercises is what they call, The Child’s Pose in yoga. To begin Child’s Pose, get down on your mat on all fours. Bring your big toes together then sit back on your heels. Stretch forward until your arms are almost flat on the floor in front of you. Your back should be relaxed as you stretch forward and remain relaxed, but not sunken into the floor. Your posture should be straight.
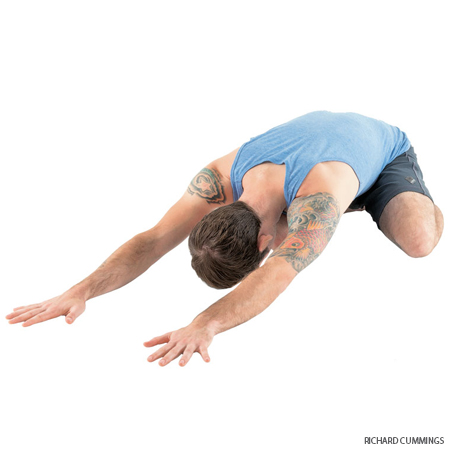
Knees should be bent with big toes still touching. You will find the feeling of this pose to be very familiar to the body. This is why it is called Child’s Pose. Relax and remain in this position for a couple of minutes if you are able. If you are uncomfortable try remaining in child’s pose for at least 30 seconds, but know that if done correctly, it is perfectly safe for the back to stay in this position for up to 3 minutes. Most people find child’s pose relaxing and will even begin to fall asleep. Falling asleep in any position is not recommended because you lose consciousness of your pose and posture and that would only exacerbate your condition.
Sources: 5 Hip Stretches You Need, Child’s Pose: Step by Step Instruction